Tuesday, September 23, 2014

Zipper Box Bag Using Prequilted Fabric

Zipper Box Bag Using Prequilted Fabric


Materials


Prequilted Fabric  (Quilt sandwich)

Zipper  12" 

Rotary cutting wheel

Cutting Mat


Lets Start!!!

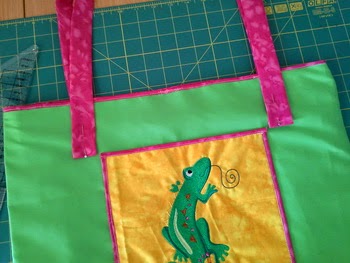
Cut out the 2  6"x10" designs (Their actual size is about 5.5" x 9.5")
Turn over 1/2 inch of fabric along the long edge of each piece to the wrong side. Press.   Place zipper along this edge. Pin in place. Sew the zipper in making a 1/4" seam.


Sew in the other piece the same way.

Fold the pieces together, right sides facing. Stitch along the long edge 1/4" seam.
Press the seam open
Open the zip into the middle of the bag. Do this before continuing.
Stitch the two short ends closed 1/4" seam.

Trim away any excess zip. Now open the short seam as shown in the photos below. Wrong side facing out. You may need to open the zipper further for this.

Using a ruler, measure an inch from the point. Pin in place and mark measurement. Sew along marking. Using pinking shears, cut away the corner leaving a 1/4" seam.
Do this with the other corners.  When done, turn right side out.
And that's it. Your Zippered Box Bag is ready to be used.

For more great Prequilted designs have a look here

Thursday, July 10, 2014

Gecko Bag

Gecko Shopping Bag


What you need:


Lining Fabric
Cotton Fabric
Bias Binding
Bias Binding Foot
Temporary Spray Adhesive
Rotary Cutter
Cutting Mat
Cutting Ruler
Fabric Pen the washes out
Cutaway Stabilizer

Cut the following:

2 x Lining 15" x 19"
2 x Outer Fabric ( I used plain cotton for this) 15" x 19"
4 x Cotton Fabric for handles 15" x 3.5"
1 x  8" x 8"  Cotton Fabric for Gecko Embroidery


Lets Get Started!!! First we will stitch the gecko design onto the 8" x 8" square. Print out the design from your embroidery software. Cut the design out and mark the center points onto the fabric. Use a fabric pen that disappears or washes out.


Hoop 1 layer of cutaway stabilizer. Spray lightly with temporary adhesive spray. Place your marked fabric onto the stabilizer. Load the design into the machine. Align the hoop and needle position according to the markings on the fabric. Embroider the design.


Cut away the stabilizer and block your design. Now we are going to add the bias binding trim. Using your bias binding foot, set up the bias binding according to the manufacturers instructions. Sew bias binding to the edges of the gecko square.


Place the square onto the right side of one of the out fabric pieces and sew in place.


Place the two outer pieces, right sides together and sew the two short sides and the bottom. Do the same with the lining pieces.


Turn the out fabric right sides out. Place the lining inside the outer fabric, wrong sides together, right sides facing out. Pin the two pieces together and sew on bias binding. This joins the lining and outer pieces together and encases the raw edges.


Now for the handles. Stitch two pieces together, right sides together, along one short side. You will then have a piece 3.5" x approx 29.5". Fold in half length ways, right sides together and stitch. Do the same with the other two pieces.


Turn right sides out and press flat. Fold the open ends up. Place the ends onto the bag and sew into place.


And that's it. Your bag is done!!!